If you use a virtual server (VPS), sooner or later you will surely encounter the problem of lack of free space on the disk. Besides the obvious solution, in the form of a virtual server upgrade, you may order and map one or several additional network drives to it.
How to order an additional network drive
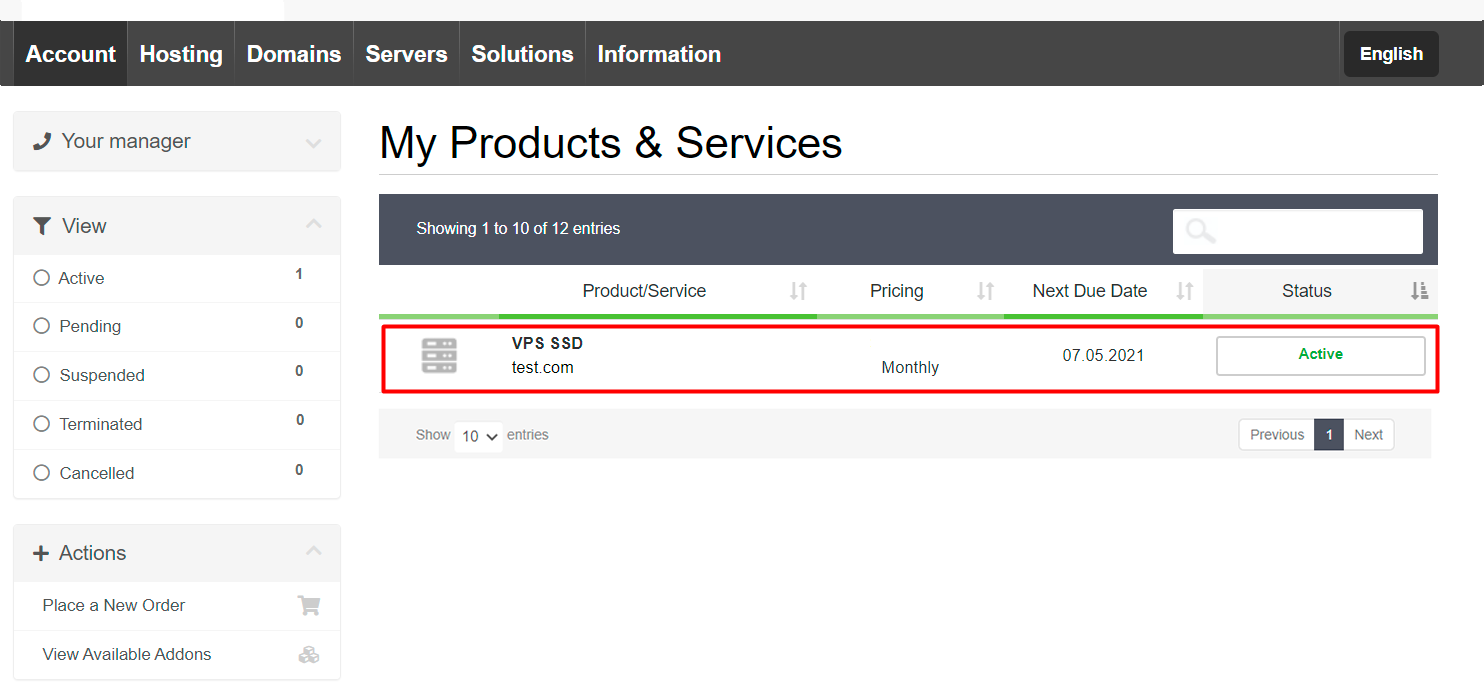
Select the virtual server to which you want to connect the additional disk (Menu “Account”, “My Services”).
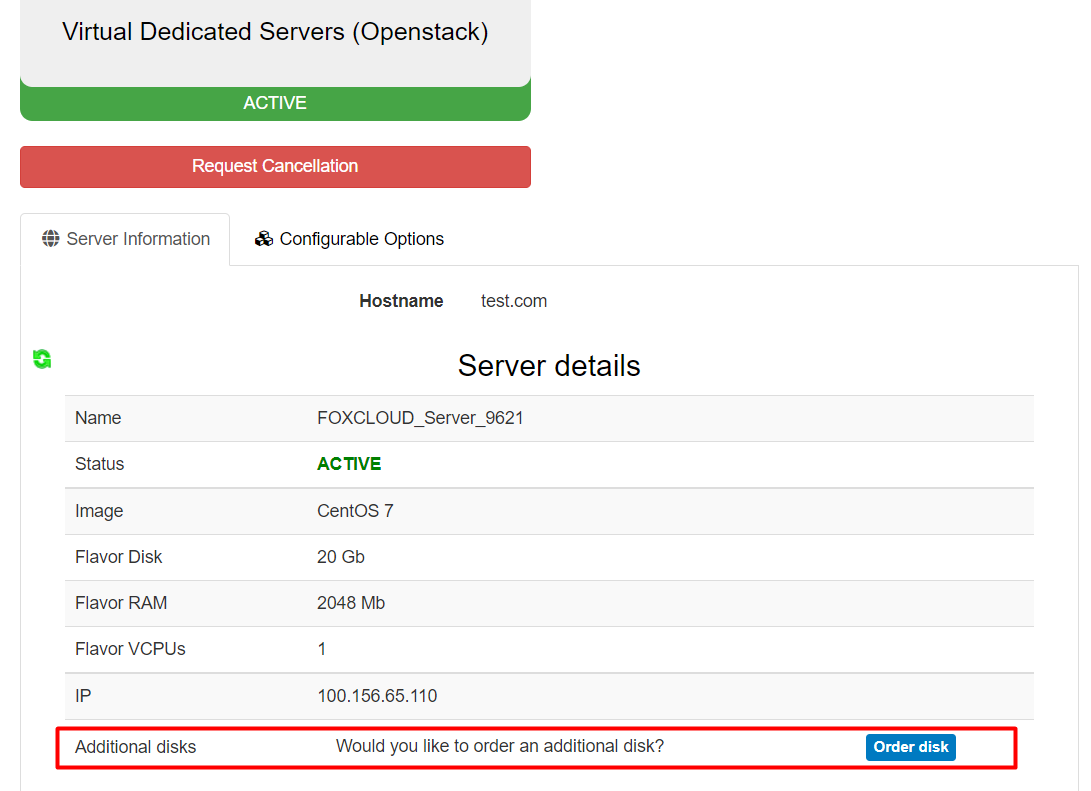
Press the button “Order disk” in the section “Additional disks”.
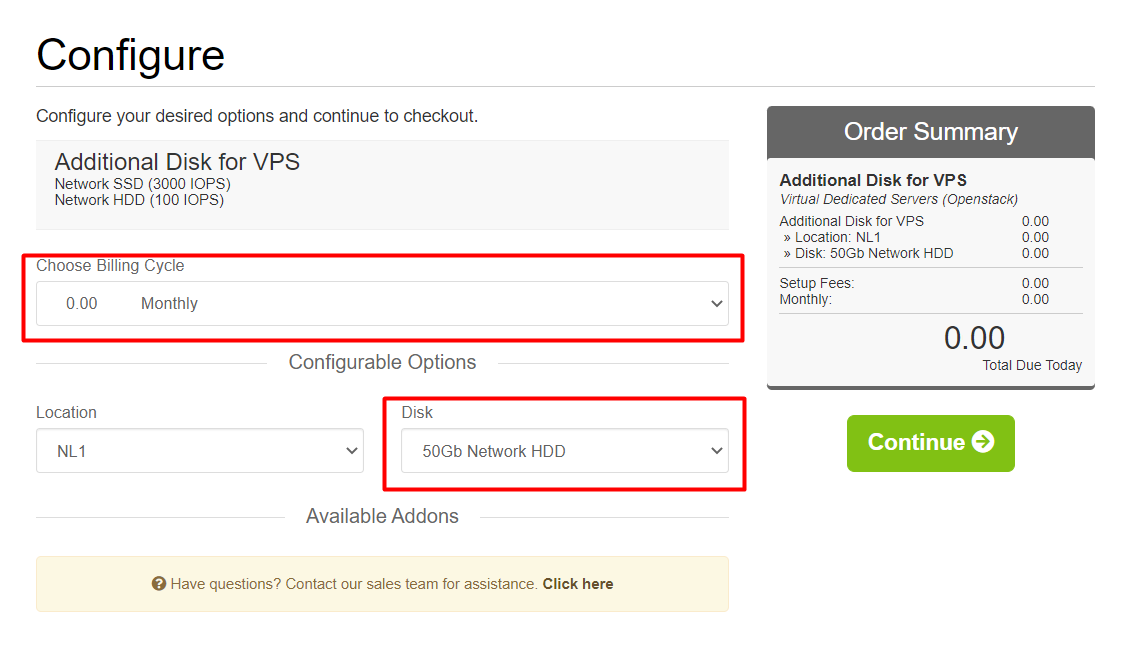
On the order page of the additional disk for VPS, select the suitable for you size and speed of the “Disk” and the “Billing Cycle”. The “Location” will be set automatically, according to the location of your virtual server to which you want to connect the disk. The disk may be connected to a virtual server located in the same region.
Complete the order registration and payment after pressing the button “Continue”.
How to map an additional network drive to your server
After paying for the additional disk order, go back to the virtual server page (Menu “Account”, “My Services”), to which it is necessary to connect the additional disk.
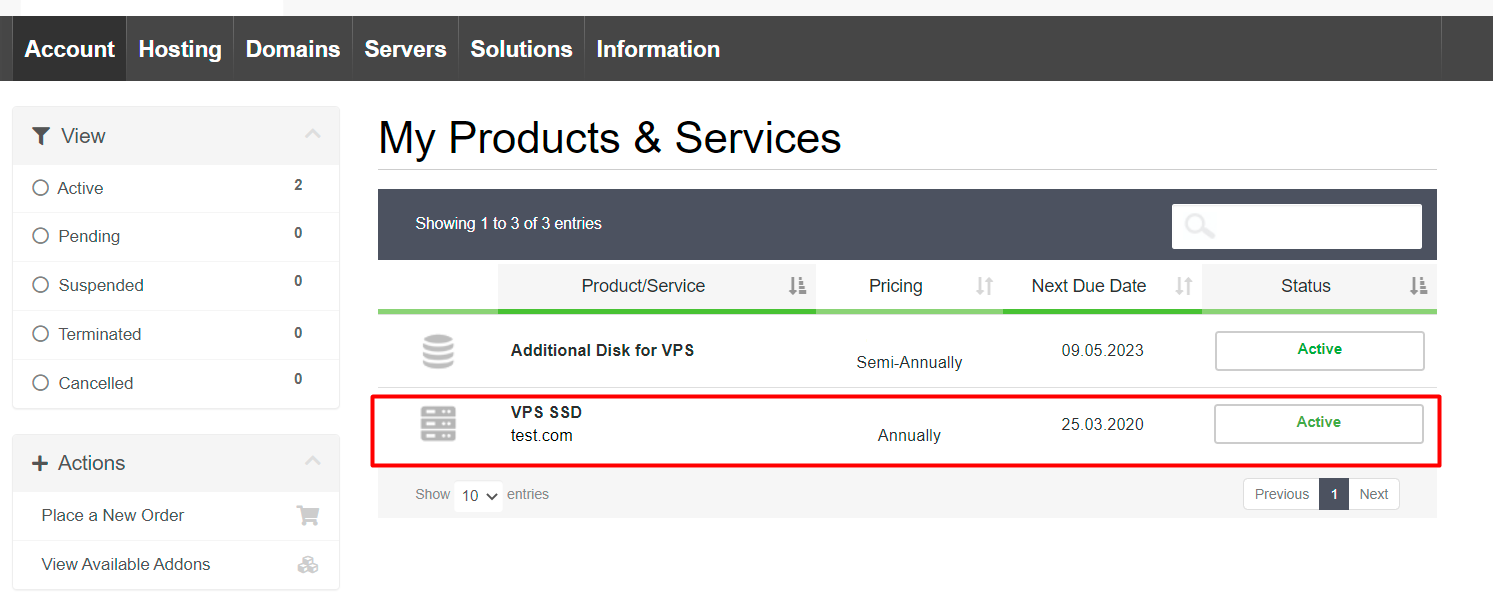
Click the “Attach” button opposite to the disk ordered by you.
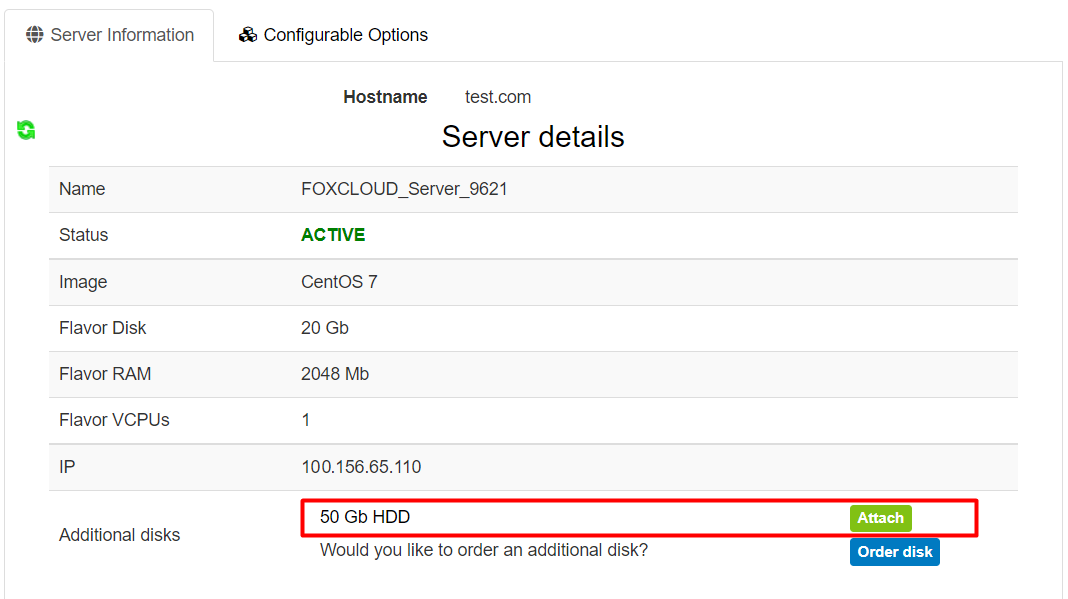
If the connection of the disk was successful, the further actions shall be performed in the operating system of the virtual server.
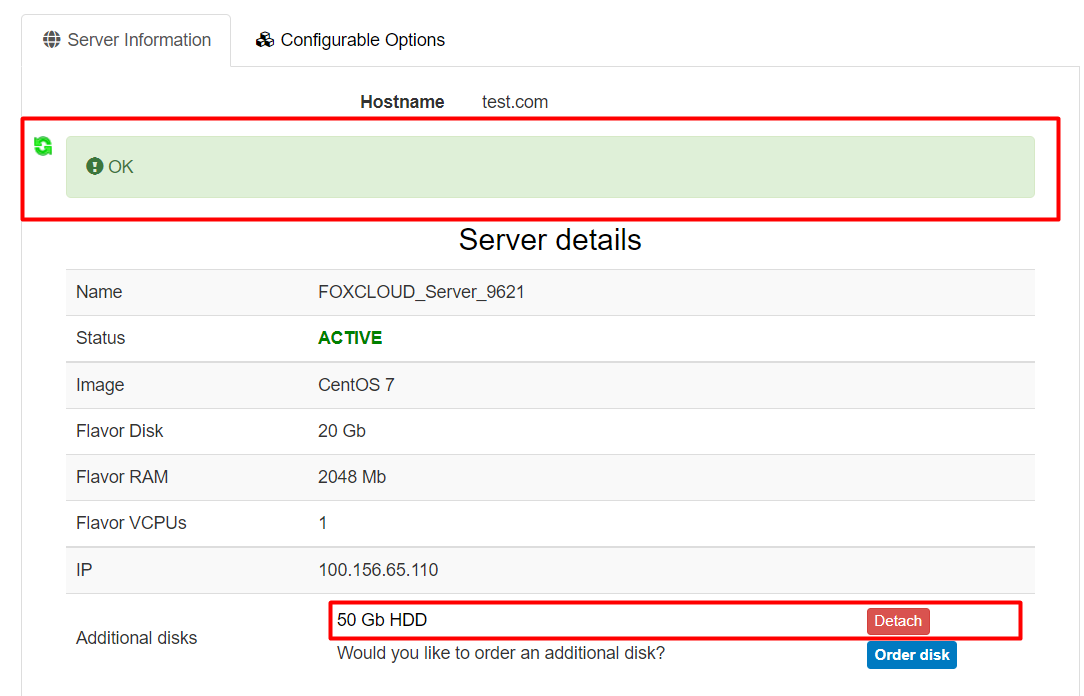
To enable the operating system to use the new disk, it must be initialized, partitioned and formatted.
How to add an additional disk to Linux OS
Connect to the virtual server using SSH.
Get the list of disks detected by the system and find your new disk in this list.
# fdisk -l

In this example, Linux shows the disk as /dev/vdb file.
Next, we will initialize, partition and format the /dev/vdb, disk, and these processes will erase all data on it.
Create a partition on the /dev/vdb disk.
# fdisk /dev/vdb

Select command m for help, then
   n   add a new partition
   p   primary (0 primary, 0 extended, 4 free)
   Partition number 1
   w   write table to disk and exit
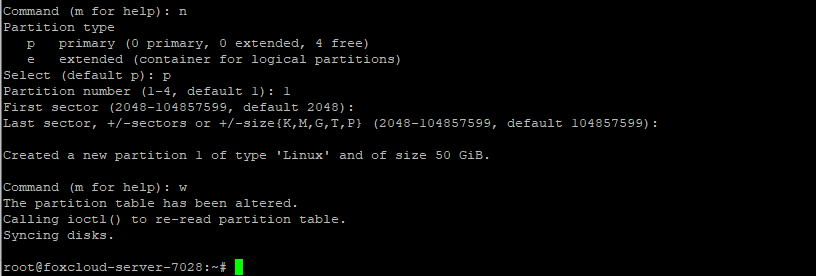
Check the created partition.
# fdisk -l

Our disk has partition 1 (/dev/vdb1)
Now you need to create a file system on the /dev/vdb1 partition, using the mkfs utility.
# mkfs -t ext4 /dev/vdb1
Create a directory (mount point) that will be used to access the data stored on the disk.
# mkdir -p /mnt/disk1
Mount the partition to the mount point.
# mount -t auto /dev/vdb1 /mnt/disk1
Now you can work with the disk along the /mnt/disk1 path.
To automatically mount the disk after the server is rebooted, add a line to the /etc/fstab file.
/dev/vdb1 /mnt/disk1 ext4 defaults 0 0
How to add an additional disk to Windows OS
Connect to the virtual server using “Remote Desktop Protocol”.
If the new disk is not formatted, Windows Explorer will not show it.
Initializing, partitioning, and formatting a disk deletes all data on it.
Right-click on the “Start” button and select “Disk Management”
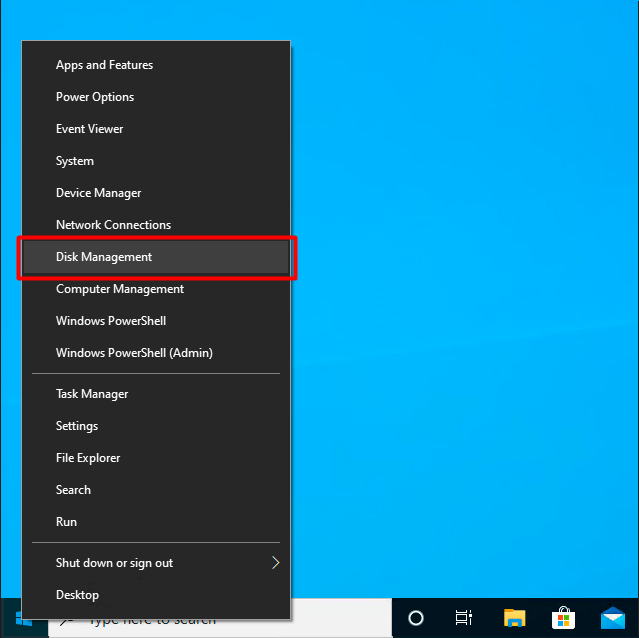
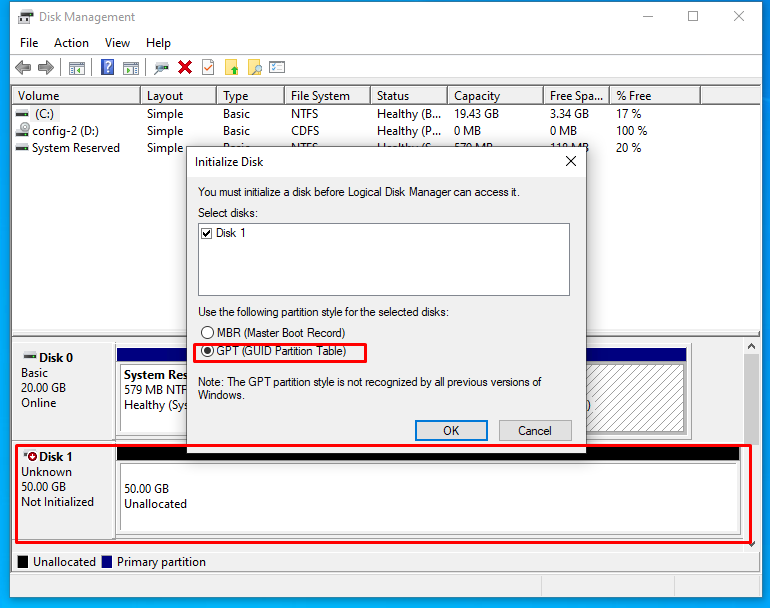
If the disk is not initialized, Windows will prompt you to initialize the disk. We recommend using the newer GPT partition style if available on your system.
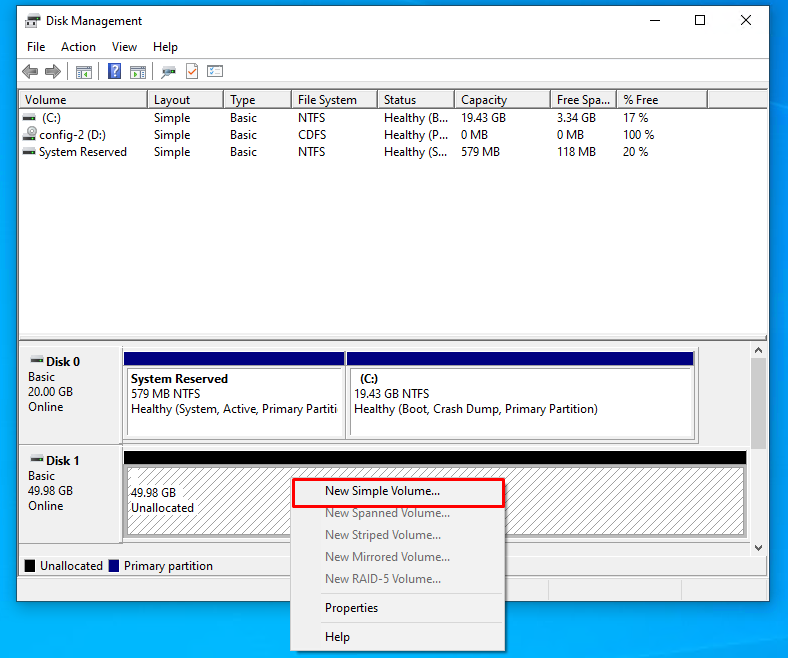
After initializing the disk, proceed to the creation of volumes (partitions) on the disk. To do this, right-click on the disk and select "New Simple Volume ..."
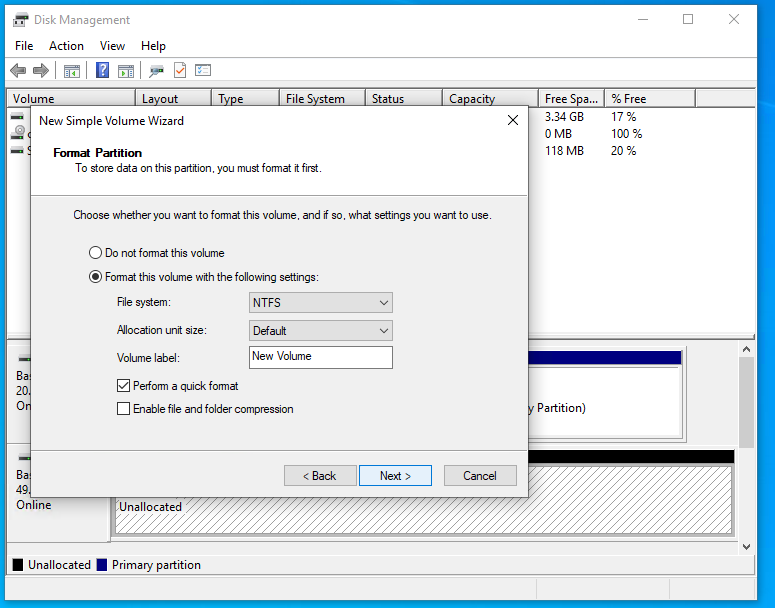
In the wizard for creating simple volumes, go through all the steps by clicking the “Next” button, if necessary, change the necessary parameters.
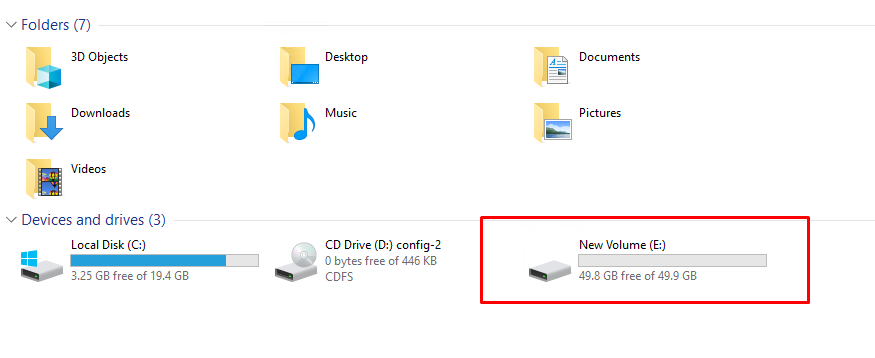
After “New Simple Volume Wizard” formatting is completed, the disk will appear in Windows Explorer.
How to disconnect an additional network drive?
Make sure that the disk you are removing does not contain the necessary data and is not being used by the operating system. For example, in case of the Linux systems, the disk is not mounted and specified in the /etc/fstab file.
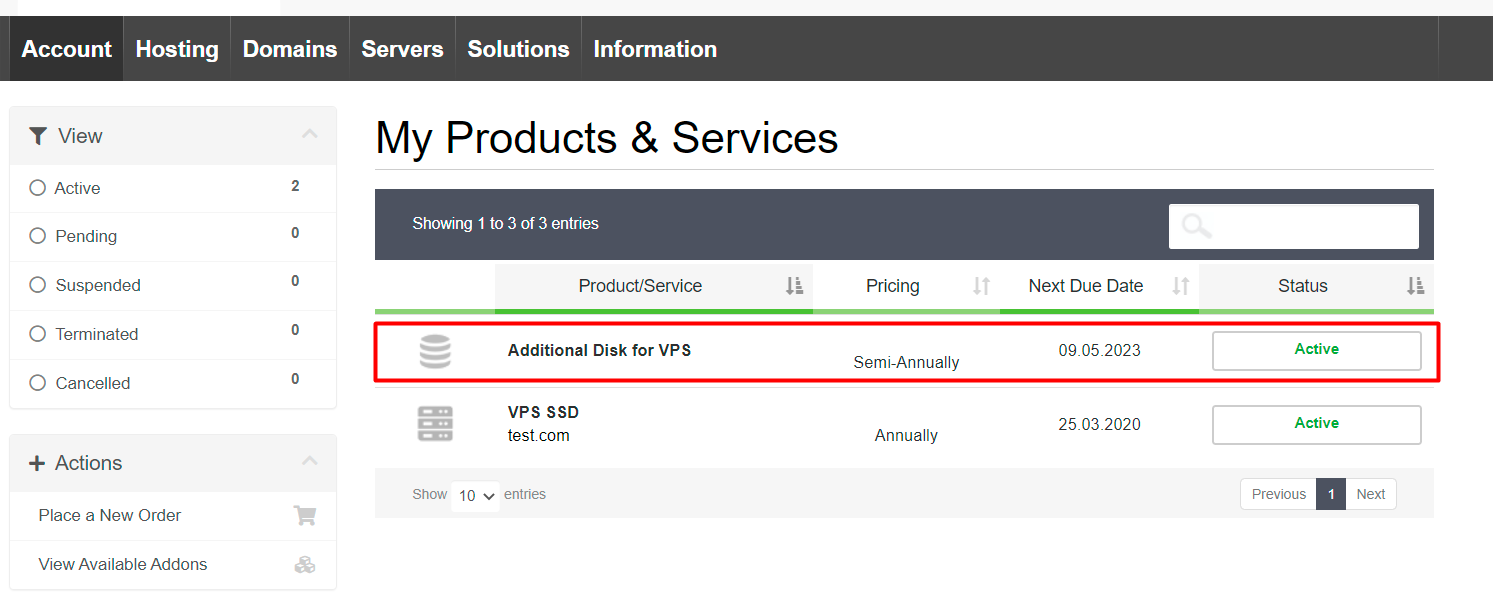
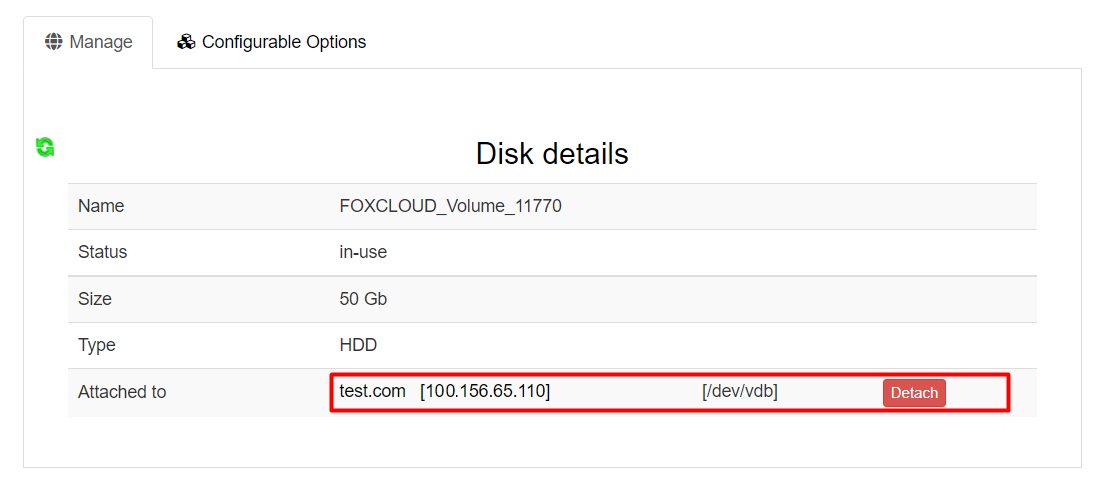
To disconnect a disk, select the disk you want to disconnect (Menu “Account”, “My Services”).
Click on the button “Detach”
Frequently asked questions
-
What is the difference between network HDD and network SSD?
-
The main advantage of network SSD is that it significantly speeds up the server.
The network HDD is suitable for storing large amounts of data that do not need to be read or rewritten frequently.
The network SSD is suitable for tasks that require high read and write speeds.
-
Is it possible to connect multiple disks?
-
Yes, you may connect (attach) multiple additional disks to one virtual server.
-
Is it possible to connect a disk to another virtual server?
-
Yes, you can write data to a disk, disconnect it from the first virtual server, and connect the disk to another virtual server located in the same region.
-
Is it possible to change the size of additional disk?
-
No, it is not possible.
You may order and connect a new additional disk of the required capacity, copy data on it, and disconnect the old one.


